本文转载自:皮宇杰
一. .常用的开源配置中心
1. Disconf
2014年7月开源,百度开源的配置管理中心,同样具备配置的管理能力,不过目前已经不维护了,最近的一次提交是两年前了。
2. Spring Cloud Config
2014年9月开源,Spring Cloud 生态组件,可以和Spring Cloud体系无缝整合。
3. Apollo
2016年5月开源,携程开源的配置管理中心,具备规范的权限、流程治理等特性。Apollos需要从官网下载服务,进行单独启动。
4. Nacos
2018年6月开源,阿里开源的配置中心,也可以做DNS和RPC的服务发现。Nacos需要从官网下载服务,进行单独启动。
5. 各配置中心比较
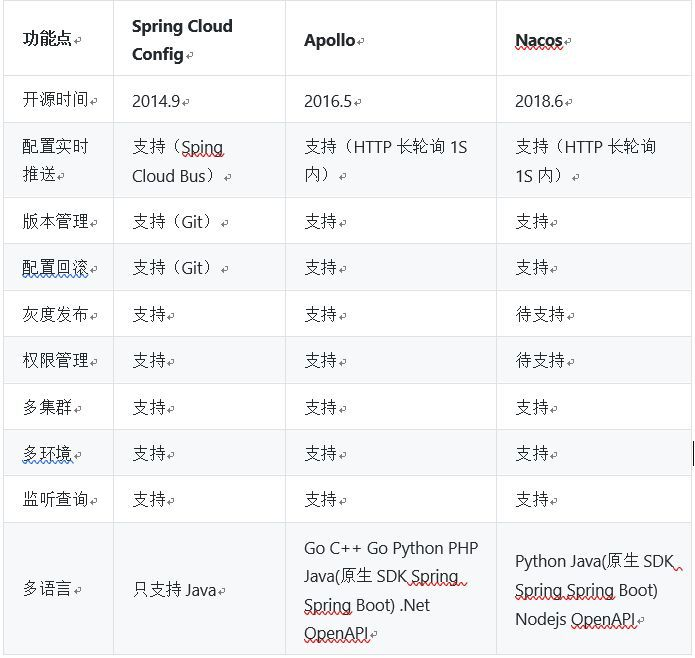
总的来说,Apollo和Nacos相对于Spring Cloud Config的生态支持更广,在配置管理流程上做的更好。Apollo相对于Nacos在配置管理做的更加全面,不过使用起来也要麻烦一些。Nacos使用起来相对比较简洁,在对性能要求比较高的大规模场景更适合。
但是对于智新来说,由于大部分是台内部署,且要求部署简单,建议使用SpringCloudConfig。
二. 配置中心的部署及使用
1 Spring Cloud Config
以电视稿件为例,springboot2.0 结合eureka
Spring Cloud Config为分布式系统中的外部配置提供服务器和客户端支持。使用Config Server,您可以在所有环境中管理应用程序的外部属性。客户端和服务器上的概念映射与Spring Environment和PropertySource抽象相同,因此它们与Spring应用程序非常契合,但可以与任何以任何语言运行的应用程序一起使用。随着应用程序通过从开发人员到测试和生产的部署流程,您可以管理这些环境之间的配置,并确定应用程序具有迁移时需要运行的一切。服务器存储后端的默认实现使用git,因此它轻松支持标签版本的配置环境,以及可以访问用于管理内容的各种工具。可以轻松添加替代实现,并使用Spring配置将其插入。
中文文档地址Springcloud中文网
1) pom依赖
1 | <!-- 配置中心 --> |
2) 启动类注解
通过在启动类上添加注解@EnableDiscoveryClient,为该应用开启配置中心功能
3) application.properties配置
1 | #服务名称 |
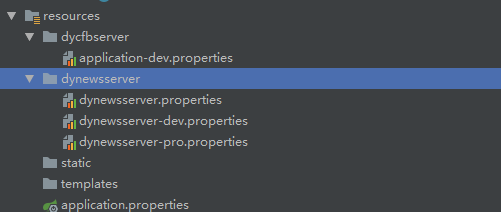
4) resource目录
5) 集成Eureka
- pom文件
1
2
3
4
5
6
7
8
9
10
<!-- 配置中心相关依赖 -->
<dependency>
<groupId>org.springframework.cloud</groupId>
<artifactId>spring-cloud-starter-config</artifactId>
</dependency>
<!-- eureka客户端 -->
<dependency>
<groupId>org.springframework.cloud</groupId>
<artifactId>spring-cloud-starter-netflix-eureka-client</artifactId>
</dependency> - bootstrap.properties
1
2
3
4
5
6
7
8
9
10
11
12
13
14
15# 服务端口
server.port=8051
spring.application.name=dynewsserver
server.servlet.context-path=/dynewsserver
#eurekadefaultZone地址
eureka.client.serviceUrl.defaultZone=http://10.10.0.215:8057/eureka/
#允许服务发现
spring.cloud.config.discovery.enabled=true
#配置中心地址
spring.cloud.config.discovery.service-id=config-server
#配置项选择
spring.cloud.config.profile=dev
#配置文件目录
spring.cloud.config.label=dynewsserver
#剩余配置,和之前电视稿件一致2. Apollo
Apollo(阿波罗)是携程框架部门研发的开源配置管理中心,能够集中化管理应用不同环境、不同集群的配置,配置修改后能够实时推送到应用端,并且具备规范的权限、流程治理等特性。
携程apollo github携程apollo配置中心
携程apollo 分布式部署指南 分布式部署指南
1) 创建数据库
Apollo服务端共需要两个数据库:ApolloPortalDB和ApolloConfigDB,我们把数据库、表的创建和样例数据都分别准备了sql文件,只需要导入数据库即可。需要注意的是ApolloPortalDB只需要在生产环境部署一个即可,而ApolloConfigDB需要在每个环境部署一套,如fat、uat和pro分别部署3套ApolloConfigDB。
数据库脚本 apolloportaldb.sql
apolloconfigdb.sql
调整eureka地址
eureka.service.url - Eureka服务Url
不管是apollo-configservice还是apollo-adminservice都需要向eureka服务注册,所以需要配置eureka服务地址。
按照目前的实现,apollo-configservice本身就是一个eureka服务,所以只需要填入apollo-configservice的地址即可,如有多个,用逗号分隔(注意不要忘了/eureka/后缀)。
需要注意的是每个环境只填入自己环境的eureka服务地址,比如FAT的apollo-configservice是1.1.1.1:8080和2.2.2.2:8080,
UAT的apollo-configservice是3.3.3.3:8080和4.4.4.4:8080,
PRO的apollo-configservice是5.5.5.5:8080和6.6.6.6:8080,
那么:在FAT环境的ApolloConfigDB.ServerConfig表中设置eureka.service.url为:http://1.1.1.1:8080/eureka/,http://2.2.2.2:8080/eureka/
在UAT环境的ApolloConfigDB.ServerConfig表中设置eureka.service.url为:http://3.3.3.3:8080/eureka/,http://4.4.4.4:8080/eureka/
在PRO环境的ApolloConfigDB.ServerConfig表中设置eureka.service.url为:http://5.5.5.5:8080/eureka/,http://6.6.6.6:8080/eureka/
2)获取安装包
可以通过两种方式获取安装包:
- 直接下载安装包
从GitHub Release页面下载预先打好的安装包如果对Apollo的代码没有定制需求,建议使用这种方式,可以省去本地打包的过程- 通过源码构建
从GitHub Release页面下载Source code包或直接clone源码后在本地构建如果需要对Apollo的做定制开发,需要使用这种方式
3) 配置数据库连接信息
- 配置apollo-configservice的数据库连接信息
1、解压apollo-configservice-x.x.x-github.zip
2、用程序员专用编辑器(如vim,notepad++,sublime等)打开config目录下的application-github.properties文件
3、填写正确的ApolloConfigDB数据库连接串信息,注意用户名和密码后面不要有空格!
4、修改完的效果如下:
1 | # DataSource |
- 配置apollo-adminservice的数据库连接信息
1、解压apollo-adminservice-x.x.x-github.zip
2、用程序员专用编辑器(如vim,notepad++,sublime等)打开config目录下的application-github.properties文件
3、填写正确的ApolloConfigDB数据库连接串信息,注意用户名和密码后面不要有空格!
4、修改完的效果如下:
1 | # DataSource |
- 配置apollo-portal的数据库连接信息
1、解压apollo-portal-x.x.x-github.zip
2、用程序员专用编辑器(如vim,notepad++,sublime等)打开config目录下的application-github.properties文件
3、填写正确的ApolloPortalDB数据库连接串信息,注意用户名和密码后面不要有空格!
4、修改完的效果如下:
1 | spring.datasource.url = jdbc:mysql://10.10.0.215:3306/ApolloConfigDB?characterEncoding=utf8 |
4) 部署apollo服务端
- 部署apollo-configservice
将对应环境的apollo-configservice-x.x.x-github.zip上传到服务器上,解压后执行scripts/startup.sh即可。如需停止服务,执行scripts/shutdown.sh.记得在scripts/startup.sh中按照实际的环境设置一个JVM内存,以下是我们的默认设置,供参考:
1 | export JAVA_OPTS="-server -Xms6144m -Xmx6144m -Xss256k -XX:MetaspaceSize=128m -XX:MaxMetaspaceSize=384m -XX:NewSize=4096m -XX:MaxNewSize=4096m -XX:SurvivorRatio=18" |
- 部署apollo-adminservice
将对应环境的apollo-adminservice-x.x.x-github.zip上传到服务器上,解压后执行scripts/startup.sh即可。如需停止服务,执行scripts/shutdown.sh.
记得在scripts/startup.sh中按照实际的环境设置一个JVM内存,以下是我们的默认设置,供参考:
1 | export JAVA_OPTS="-server -Xms2560m -Xmx2560m -Xss256k -XX:MetaspaceSize=128m -XX:MaxMetaspaceSize=384m -XX:NewSize=1024m -XX:MaxNewSize=1024m -XX:SurvivorRatio=22" |
- 部署apollo-portal
将apollo-portal-x.x.x-github.zip上传到服务器上,解压后执行scripts/startup.sh即可。如需停止服务,执行scripts/shutdown.sh.记得在startup.sh中按照实际的环境设置一个JVM内存,以下是我们的默认设置,供参考:
1 | export JAVA_OPTS="-server -Xms4096m -Xmx4096m -Xss256k -XX:MetaspaceSize=128m -XX:MaxMetaspaceSize=384m -XX:NewSize=1536m -XX:MaxNewSize=1536m -XX:SurvivorRatio=22" |
- 配置portal可多环境显示
修改apolloportaldb.serverconfig的apollo.portal.envs 填入环境名,用英文逗号分隔
如:dev,pro修改apollo-portal目录中config\apollo-env.properties文件
如:local.meta=http://10.10.0.215:8880
dev.meta=http://10.10.0.215:8880
fat.meta=http://fill-in-fat-meta-server:8080
uat.meta=http://fill-in-uat-meta-server:8080
lpt.meta=${lpt_meta}
pro.meta=http://10.10.0.215:8880
效果: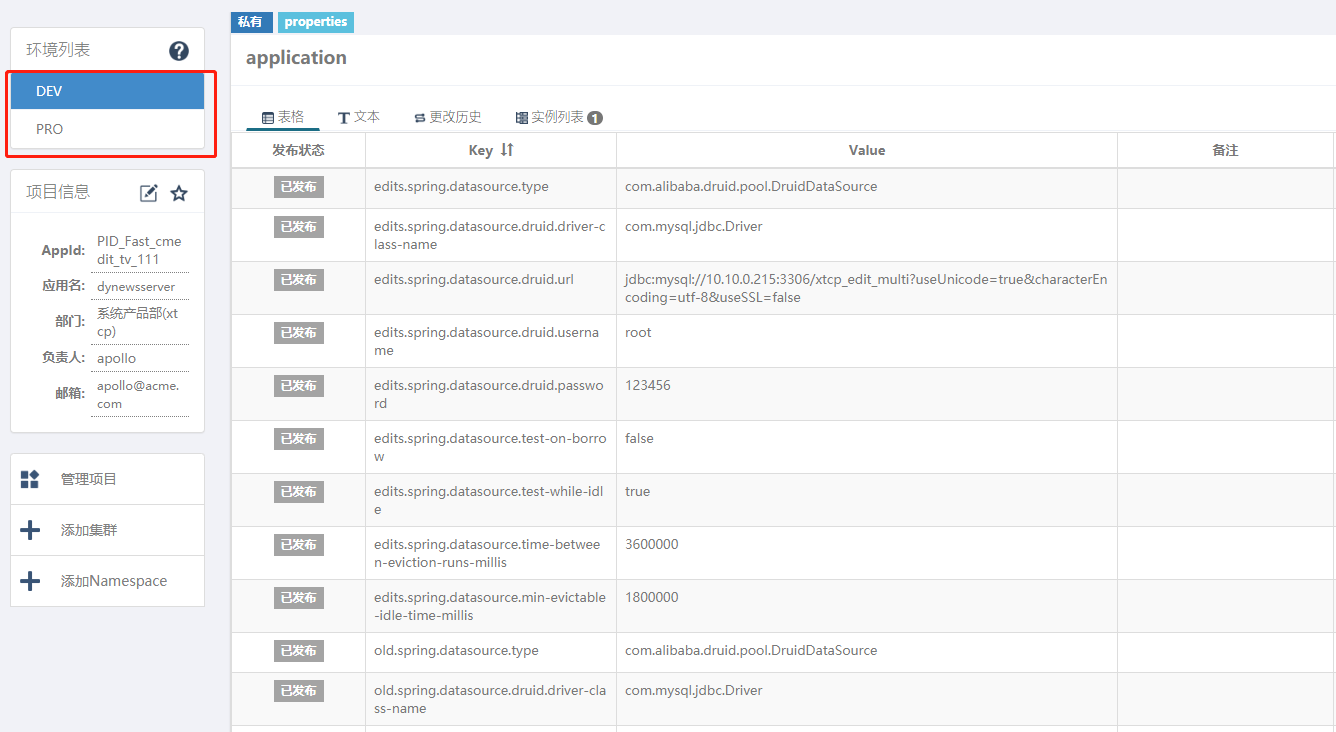
5) 客户端部署
- pom文件
1 | <dependency> |
- application.propertie文件
1 | # 启动apollo配置 |
- 将application-dev.properties文件中的内容复制进apollo配置
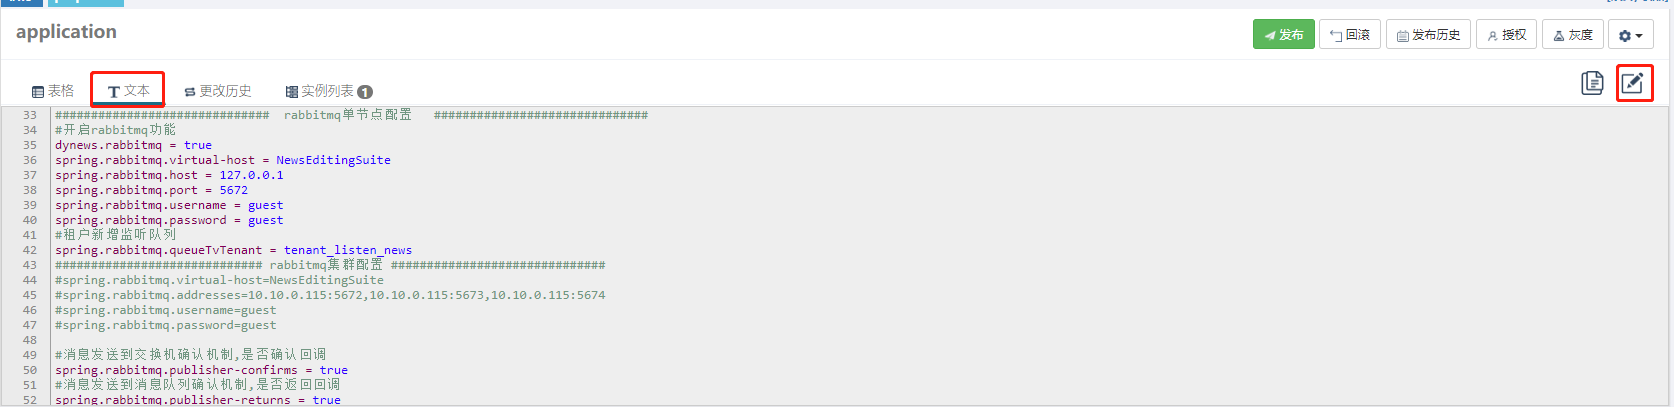
复制完成后提交修改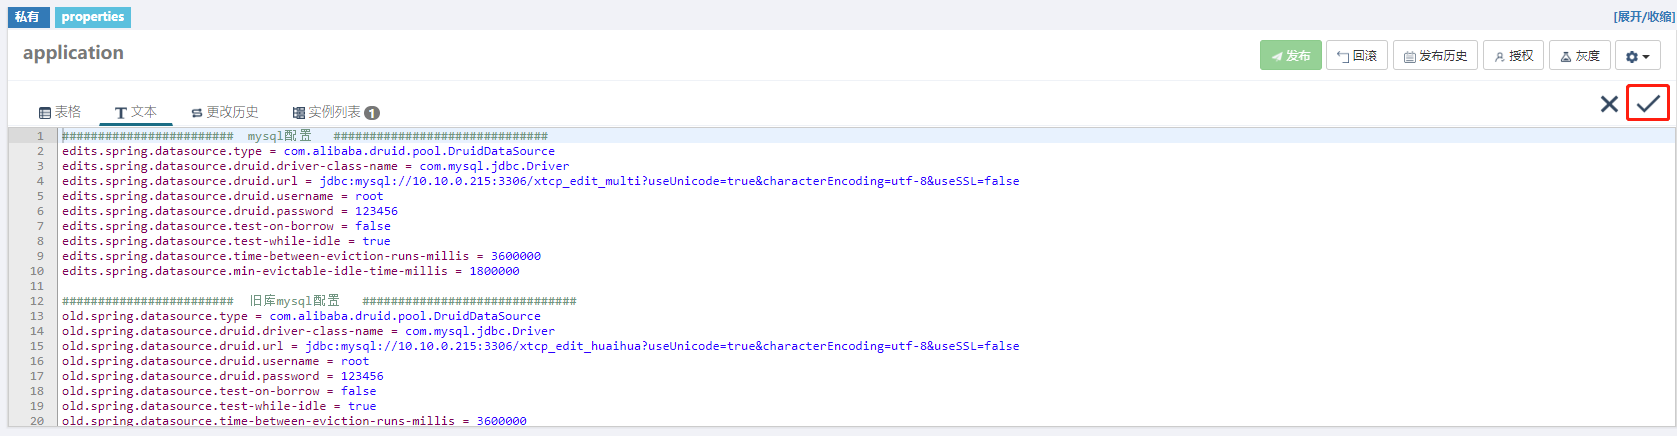
发布配置
- 启动电视稿件服务,配置生效
3 nacos(简易部署)
1). 下载安装包
nacos-server-1.1.4.zip
解压之后进入bin目录下,运行startup.cmd,或者cmd运行
2). 客户端pom文件
SpringCloud版本选择的是Spring Cloud Finchley 版本,所以引入以下依赖
1 | <dependency> |
在 dependencyManagement 中添加如下内容
1 | <dependency> |
3). 客户端bootstrap.properties文件
1 | #服务名 |
4). 刷数据库
数据库脚本位置在安装包config目录下的nacos-mysql.sql文件
5). 向nacos中添加配置
nacos提供了可视化页面
http://10.10.0.215:8848/nacos/index.html
默认用户名密码 nacos nacos,登陆之后页面如下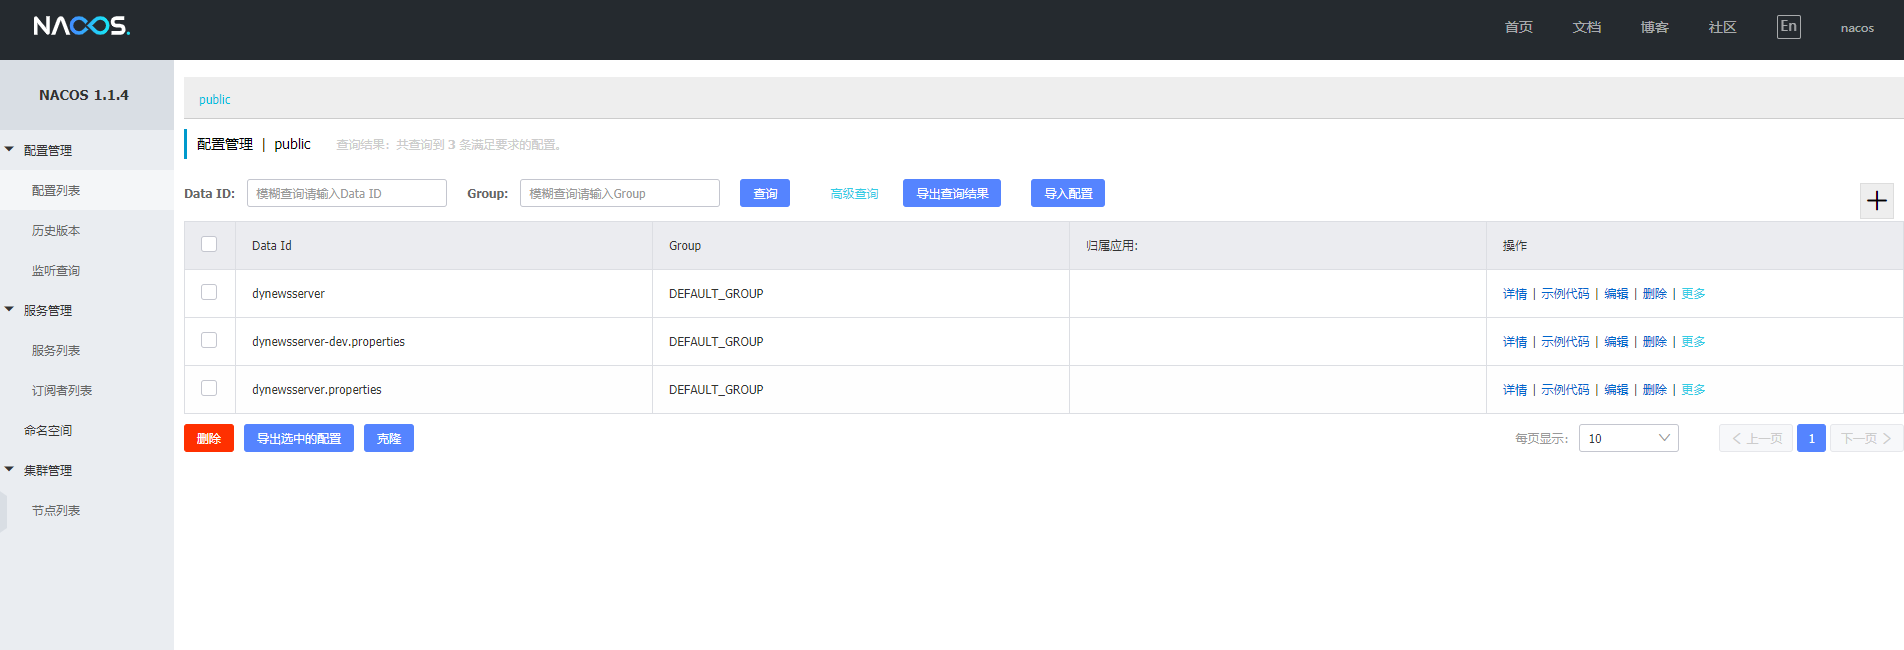
新增配置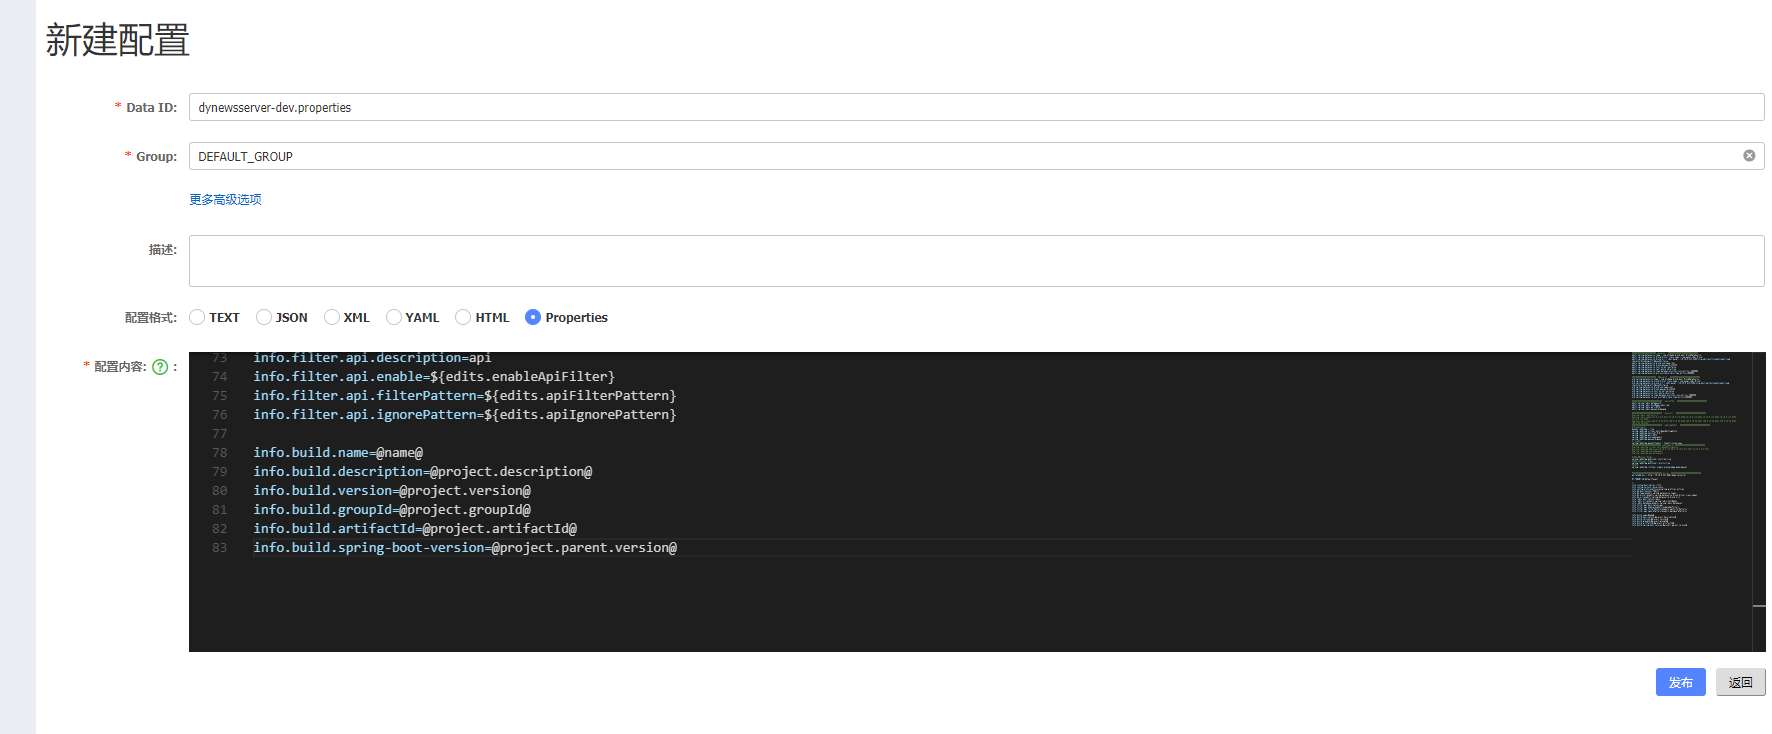
其中 data-id格式为
1 | ${prefix}-${spring.profile.active}.${file-extension} |
其中prefix默认为spring.application.name的值,也可以通过配置项spring.cloud.nacos.config.prefix来配置
spring.profile.active 即为当前环境对应的 profile,详情可以参考 Spring Boot文档。 注意:当 spring.profile.active 为空时,对应的连接符 - 也将不存在,dataId 的拼接格式变成 $${prefix}.${file-extension}
file-exetension 为配置内容的数据格式,可以通过配置项 spring.cloud.nacos.config.file-extension 来配置。目前只支持 properties 和 yaml 类型。